Wavy text — sometimes called curved wave text — is letters that ripple up and down like a wave instead of sitting on a straight line. It's the playful cousin of curved text, and it's the look behind fun social posts, party invitations, logos, and stickers. This guide shows you how to make wavy text for free — the easiest way to make text wavy online — with a tool that exports a clean, transparent PNG.
TL;DR: open the wave text generator, pick the wave shape, type your text, tune the height and spacing, and export a transparent PNG. Done in a couple of minutes, no signup.
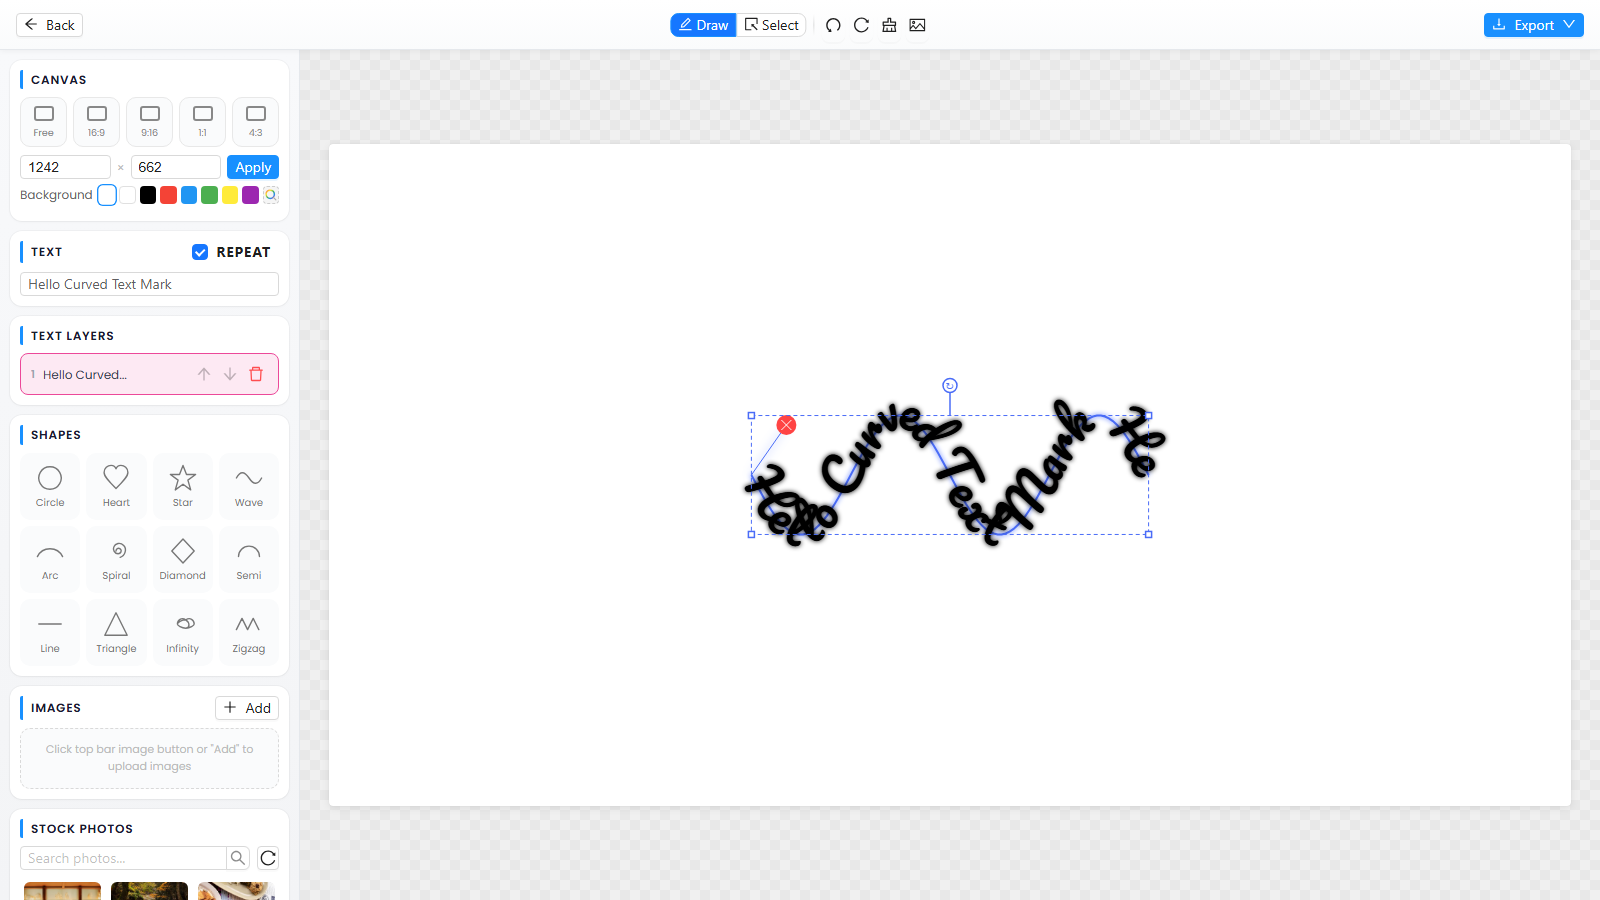
How to make wavy text (step by step)
Using the free CurvedTextMaker wave text tool:
- Open the wave text generator at /wave-text-generator.
- Choose the wave shape so your text flows up and down instead of in a straight line.
- Type your text — short phrases work best. A few words ride the wave cleanly; long sentences cramp the curves.
- Adjust the wave height — a taller wave is dramatic and bouncy; a gentler wave stays calm and readable.
- Tune the letter spacing so each character has room at the peaks and troughs (see the tips below).
- Pick a font and color — bold, even-weight fonts hold their shape as they ripple.
- Export a transparent PNG — your wavy text lands on a transparent background, ready to place anywhere.
Because the export is transparent, you can drop the wavy text onto a photo, a colored background, or another design without any cleanup.
Tips for clean wavy text
Small adjustments turn bumpy letters into a smooth, professional wave:
- Keep it short. Two to five words ride a wave best. Crowding a wave with a long sentence flattens the curves and hurts readability.
- Match wave height to font size. Big, bold letters can handle a tall wave; small or thin letters get lost at the peaks. Scale the two together.
- Add letter spacing. Letters compress and stretch as they climb and dip — extra spacing keeps them even across the wave.
- Choose even-weight fonts. Bold sans-serifs hold their shape across the whole wave; thin strokes fade out at the troughs.
- Use one strong phrase. A single wave with one clear line reads better than several competing waves stacked on top of each other.
What to use wavy text for
Wave text shows up wherever a design needs energy or motion:
- Social media posts and stories — eye-catching headlines for Instagram, TikTok, and YouTube thumbnails.
- Party and event invitations — birthdays, weddings, beach and summer themes.
- Logos and wordmarks — playful brands, cafés, surf and music labels.
- Stickers and decals — laptop, car, and product stickers.
- T-shirts and apparel — fun, casual prints.
- Posters and flyers — event headers that feel lively.
Want a different flow? The same editor handles circle, arc, spiral, and heart text — see the full text tools hub.
Wave text vs. arc text vs. circle text
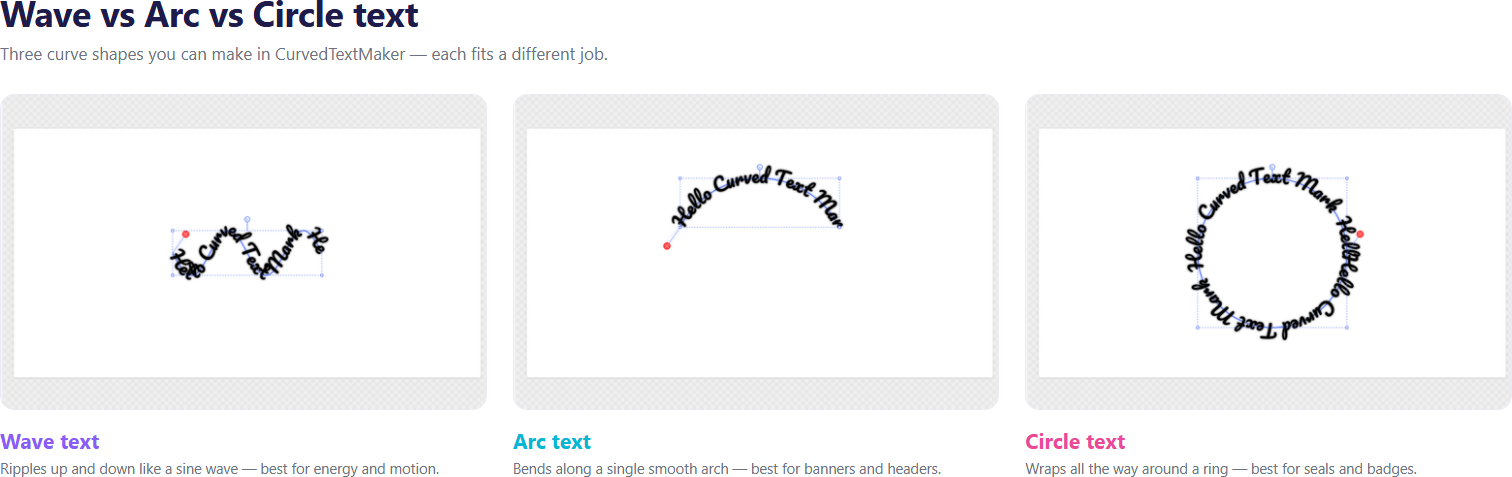
These shapes get mixed up, but they create very different effects:
- Wave text ripples up and down (like a sine wave) — best for energy and motion.
- Arc text bends along a single smooth arch — best for banners and headers.
- Circle text wraps all the way around a ring — best for seals and badges.
Not sure which you need? If you want motion, use the wave text generator; for a clean banner, try the arc text generator; for a badge, follow our text in a circle guide.
Tools for making wavy text
- CurvedTextMaker — free, no signup, dedicated wave shape, transparent PNG export. Start at /wave-text-generator.
- Canva — can curve text into an arc, but a true repeating wave needs manual tweaking (more in our Canva curve guide).
- Pro design apps (Illustrator's Type on a Path, Photoshop's Warp Text) — for designers who want full control.
For most people, a dedicated wave text generator is the fastest route. Our comparison of free curved text tools breaks down the options.
Bottom line
Making wavy text is quick once you know the trick: pick a wave shape, keep the phrase short, match the wave height to your font, and export a transparent PNG. Ready to try it? Make wavy text free — no signup required.